
Always Yes
So I have a bit of a life update, and this one is a good one.
For the first time in almost a year, I took some time away from my stitching. My mother flew in for her birthday week of Colorado celebrations and my partner's whole family (parents, grandma, brothers and their families) also decided to make the trip at the same time. We packed twelve of us in the house for dinners and socializing, kept the little ones busy with various activities around town, and it was wonderful to have everyone around.
Little did I know...
One evening we all gathered out in the park behind our house for a family photo shoot. It had been a few years since we were all together, and it was a special thing for us to have to remember the time. We have a professional photographer in the group, and she coordinated stills and video as we chased the little ones around and worked hard to get them to "cheese" at the camera in unison. A few group photos in, I felt a tap on my shoulder.
Alex was on his knee behind me.
I might have shrieked? Maybe it was a gasp? I blacked out.
The crowd dispersed. I never heard their hollers and squeals, only the words he had clearly rehearsed but still struggled to get out. Of course, it was always going to be "yes".

I don't much like surprises, but he did an amazing job keeping this a secret and I was completely caught off guard. The whole family knew it was coming at some point over the week but, as it was made very clear in the video, they didn't know it was going to be that evening, in that place. Luckily he gave Thais a heads up so she was ready with the camera, and she gave him the cue when to start so she could capture it all. I'm glad he chose to share this moment with our loved ones and that it was all caught through photos and video that we'll have forever.

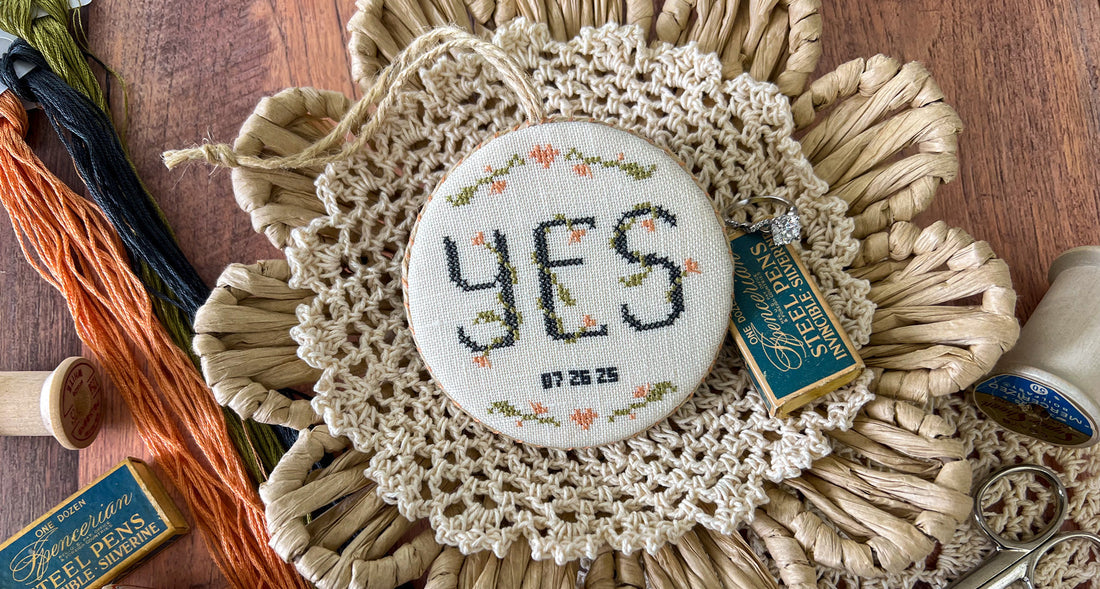
After the dust settled, I knew I wanted to stitch a little something that we could hang to remind of us of that day and the togetherness and commitment we shared with those closest to us. Please use this pattern to celebrate this milestone with your partner in life or friends and family that you love and cherish.

My ornament was stitched on 36 count linen in the color Winter Moon by Zweigart. The finish is 3" in diameter, which makes a nice sized ornament. I opted for 1 strand of DMC floss over 2 fabric threads for a softer appearance to the piece.
I used DMC from stash - 402, 3012, 3799 - but you could very easily pull your favorite overdyed or thread from stash in colors that speak to you or the couple you're stitching for. I originally contemplated very light whites and warm neutrals for a wedding vibe, but that's not really us, and so I picked a few of our favorites.
The design is only 50 stitches tall and 50 stitches wide with a lot of negative space, so it's not nearly the time commitment that my fiancé and I have just made to each other, and I finished it in one evening. ;)
I chose to stitch the date over 1 to keep it legible but unobtrusive. All the numbers are charted in the pattern if you'd like to use them but I've also saved that chart space free if you want to replace the date with initials or a combination of both. You'll find my date in there as a guide for where I placed my numbers on the stitch for reference.

To finish, I cut two 3.25" rounds out of art board using the knife blade on my Cricut machine (my hands just can't manage scissors through that kind of material). I used a little 505 spray adhesive to temporarily secure a little natural cotton quilt batting to one of the rounds and cut off the excess then, once it was fully dry, I laced my stitch piece to the round. To compliment my stitch, I laced some blue cotton fabric from my stash onto the other round for the backing.
I hate to use glue on my pieces but, like my relationship, this one won't be going anywhere so I followed Helen D's suggestion and painted Aleene's tacky glue onto the laced portion of my back piece. I smushed the two halves together under a few of my old heavy textbooks for the rest of the day. I knew there was a reason I keep those old things around. Once it was fully dry and secure, I cut a length of twine long enough to encircle the piece and act as a hanger. After pinning it in place, I used some of the thread from the stitch to create a delicate accent and secure the twine in place.

I'm so happy with how it came out, and it will hang year round in my cabinet of special things.

Congratulations to you or the special couple in your life. It's a journey, and ours is just beginning.

Happy celebrating and as always, happy stitching!
